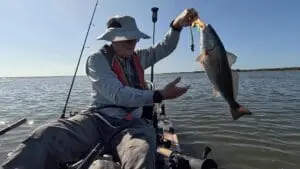
When fishing season winds down, I like to spend a little time maintaining my pedal kayak before putting it away. A few simple checks now can prevent surprises when it’s time to get back on the water.
For this maintenance routine, I’m using my Hobie Compass as the example, but most of these steps apply to just about any pedal-drive fishing kayak.
My kayak is also stored outside under a cover, so cleaning, UV protection, and proper storage are particularly important.
1. Remove the Pedal Drive, Seat, and Accessories
I start by stripping the kayak down.
I remove the pedal drive, seat, and any fishing gear or removable accessories. This makes the kayak easier to clean and exposes areas that are normally difficult to see.
This is also a good opportunity to remove everything from the storage compartments and make sure nothing is left behind.
2. Thoroughly Wash the Kayak
Next, I give the entire kayak a thorough freshwater cleaning.
This is especially important if you fish saltwater. I concentrate on areas where salt, sand, and debris tend to accumulate, including:
- Pedal-drive well
- Scupper holes
- Rudder area
- Cockpit
- Storage compartments
- Gear tracks
- Around hatches and deck hardware
I also open the hatch and check inside the hull for water.
The kayak should be completely drained and allowed to dry before long-term storage.
3. Inspect the Hull
A clean kayak makes it much easier to find damage.
Normal scratches don’t concern me very much. Fishing kayaks will get scratched.
Instead, I’m looking for:
- Deep gouges
- Cracks
- Excessive keel wear
- Damage around the scupper holes
- Damage around the pedal-drive opening
- Unusual dents or deformation
Pay particular attention to the keel and other areas that regularly contact the ground.
Finding a developing problem now gives you plenty of time to address it before your next fishing season.
4. Inspect the Pedal Drive
The pedal drive is one of the most important components on a pedal kayak, so I inspect it thoroughly before putting it away.
Maintenance requirements vary by manufacturer and drive design, so follow the recommendations for your particular drive.
On my Hobie Compass, I’ll clean the drive and inspect the fins, masts, pedals, cranks, and other moving components.
I’m looking for wear, damage, loose parts, or anything that doesn’t operate smoothly.
I’ll work the drive through its normal range of motion and make sure everything feels right.
I also prefer to remove the pedal drive and keep it somewhere protected rather than leaving it outside on the kayak during long-term storage.
5. Check the Pedal-Drive Mounts
With the pedal drive removed, inspect the mechanism that secures the drive to the kayak.
My Hobie Compass uses Hobie’s Click-and-Go system. I clean the mounts, check for damage, and operate them to make sure they work correctly.
Other pedal kayaks use different mounting systems, but the same basic principle applies: inspect whatever secures your drive to the kayak.
6. Inspect the Rudder and Steering
Next, I check the entire rudder and steering system.
I deploy and retract the rudder several times and work the steering through its full range.
I’m looking for:
- Damage to the rudder
- Excessive looseness
- Binding
- Damaged or worn components
- Problems with accessible rudder or steering lines
Don’t Ignore Minor Rudder Damage
Because I fish around oyster beds, the bottom of my rudder occasionally picks up small burrs.
If the rudder has only minor raised burrs and no serious damage, I lightly smooth the raised material with fine sandpaper rather than trying to refinish or reshape the rudder completely.
The important point is not to remove material just to eliminate cosmetic scratches aggressively. I’m simply knocking down rough, raised areas while maintaining the original rudder shape.
7. Clean and Inspect the Seat
Next, I wash and inspect the seat.
I check:
- Mesh or fabric
- Frame
- Straps
- Clips
- Buckles
- Attachment points
I let the seat dry completely before storing it.
Because my kayak stays outside, I prefer to remove the seat and keep it somewhere protected during the off-season.
8. Inspect the Deck Hardware and Fishing Accessories
Now I work my way around the kayak and check everything.
That includes:
- Carry handles
- Bungee cords
- Hatches and seals
- Rod holders
- Gear tracks
- Paddle retention system
- Leashes
- Aftermarket mounts
- Other fishing accessories
Anything that’s badly worn or damaged goes on my winter replacement list.
I’d rather replace a worn component during the off-season than discover the problem when I’m getting ready to go fishing.
9. Apply 303 Aerospace Protectant
After thoroughly cleaning and drying the kayak, I apply 303 Aerospace Protectant to the appropriate plastic surfaces.
This is particularly important to me because my kayak spends much of its life outdoors.
I use 303 as an additional layer of UV protection before storing the kayak.
I apply the product, then wipe the treated surfaces completely dry rather than leaving excess product on the kayak.
10. Store the Kayak Properly
How you store a kayak can be just as important as the maintenance you perform before putting it away.
Always check the manufacturer’s recommendations for your particular kayak.
For my Hobie Compass, I make sure the hull is properly supported and don’t use the kayak cart for long-term storage.
Because my kayak stays outside, I also use a cover.
I arrange the cover so it sheds water rather than creating a low spot where rain can collect, and I periodically check underneath it during the off-season.
My End-of-Season Pedal Kayak Checklist
- ☐ Remove pedal drive
- ☐ Remove seat and accessories
- ☐ Thoroughly wash kayak
- ☐ Remove all water from inside hull
- ☐ Allow kayak to dry
- ☐ Inspect hull and keel
- ☐ Inspect scupper holes
- ☐ Inspect pedal-drive opening
- ☐ Clean and inspect pedal drive
- ☐ Inspect drive mounting system
- ☐ Inspect rudder
- ☐ Smooth minor rudder burrs if necessary
- ☐ Check steering operation
- ☐ Clean and inspect seat
- ☐ Inspect handles, bungees and hatches
- ☐ Inspect rod holders and accessory mounts
- ☐ Replace worn components
- ☐ Apply UV protectant
- ☐ Properly support kayak for storage
- ☐ Install outdoor cover
- ☐ Periodically check kayak during the off-season
Final Thoughts
End-of-season kayak maintenance doesn’t have to be complicated.
Clean it. Inspect it. Maintain it. Protect it. Store it.
I’m demonstrating these steps with my Hobie Compass, but the basic routine applies to many pedal-drive fishing kayaks. For drive maintenance and long-term storage, follow the manufacturer’s recommendations for your particular kayak.
Spending a little time on preventative maintenance now means there’s a better chance that when fishing season rolls around again, I’ll be spending my time fishing instead of working on my kayak.
And if you fish around oyster beds as I do, don’t forget to look underneath that rudder. Those oysters have a way of leaving their mark.